Saturday, December 29, 2012

Eating in Singapore and Bali

Happy holidays and happy new year, dear reader!  I hope the season has treated you all well, however you chose to spend it. I've had the delightfully good fortune of spending the past couple weeks in southeast Asia, mostly with my sister Melanie's family in Singapore. While Singapore is a (_very_) long way to travel to see my favorite niece, it's also an amazing place to eat. I've discussed this on Pearwise before.

While I'm told Singapore has a great and interesting top-end restaurant scene, my favorite thing to do here is eat in small, local restaurants and hawker centers. I've eaten local food nearly every day since arriving here, and will share a few of my favorites with you here.

Murtabak and curry gravy
On the first day (before Melanie got back from a separate vacation), I went to a little Malaysian restaurant nearby that serves great murtabak. This is a fried pancake that's stuffed with mutton (or other meat options) cooked with garlic and onions. It's served with a curry gravy (much like a sambhar) and some sliced cucumbers. I like to dip bits of the pancake into the gravy or sometimes pour a little on top of each bite. It is extremely unhealthy and extraordinarily delicious.


Idlis, chutneys and dhal
Another favorite treat not local to Singapore, but entirely appropriate for the Little India neighborhood where Melanie et al. live is idlis and dosas. Our favorite spot for these is the Murugan idli shop (which is apparently a chain). Idlis are steamed pancakes made from a fermented batter of rice flour (of a particular type) and lentil flour. Dosas, as you may know, are very large, flat crepe-like pancakes made from a similar batter that are wrapped around a filling. At Murugan, these are served on a banana leaf with several types of chutney (here there's coconut, tomato, coriander and mint), and a bowl of dhal. You only pay for the pancake items. They will keep refilling the chutneys and dhal as long as you're sitting there. Idlis have a wonderful spongy texture that sops up the chutneys and a pleasant, slightly sour taste. I'd actually really like to make these myself, so I bought an idli steaming pan and you should watch for a post on my experience. And if you happen to be from South India, I welcome your advice.

Chili Crab
We did have one higher-end meal in terms of price, though it was a pretty simple dish. Singapore is known for chilli crab, a dish in which crabs are stir-fried in a sweet and spicy tomato-based sauce. As with other large shellfish, it's a lot of effort and a fairly messy endeavor, but the meat is tender and the sauce is delicious! The crab was served with some fried buns that were also pretty tasty, and we also had a mango salad with duck and some fried rice.

Seafood dish
Another highlight was when my friend Jude took me to a great little place just outside Chinatown where we had various wok-cooked specialties that I loved eating, but confess that I left ordering in Jude's able hands and don't recall the details. Among other things, we had some sort of wok-fried wide noodle dish and a seafood stew of sorts in a thickened sauce.

Eating prawn mee at the Old Airport
Road Hawker Centre
Plus Melanie and I went to the famous Old Airport Road Hawker Centre. There, we tried several recommended dishes including prawn mee (thin yellow noodles in a rich broth with prawns); char kway teow (fried rice noodles in a spicy brown sauce with Chinese sausage, vegetables, crispy bits of lard and fishcake); chee cheong fun (a large filled rice noodle roll covered in sweet soy sauce), and a curry puff (spicy curry encased in a puff pastry shell and deep fried). This was not a meal recommended by cardiologists, but seriously delicious.

Tropical fruits in Bali
There were many more highlights, of course. Fabulous fresh tropical fruits like mangosteens, tamarillos, soursop, mangoes, rambutans and passionfruit.  A weekend in Bali with plenty of satay, nasi goreng and nasi campur. Soup dumplings at Din Tai Fung. Laksa and otah at 328 Katong. So very much tastiness.

I also picked up a really nice Peranakan cookbook, so stay tuned for some posts on my experiences trying to recreate some of these dishes in Chicago!


Friday, December 14, 2012

Oatmeal Raisin Ice Cream

I've said this here before, but one of my favorite things about food is that the possibilities of what you can do with it are virtually limitless. We are mostly constrained by tradition and lack of imagination; and it can be fun to play with people's expectations. Ice cream can be a great way to do this because it is such a tasty canvas, and people's expectations are so often constrained by what's commercially available.

That's what excited me about David Lebovitz's recipe for oatmeal raisin ice cream. I had never had or heard of oatmeal raisin ice cream. Have you? Surely you've eaten cookies by that name; but probably not ice cream. This recipe takes the cookie as its inspiration and aims to replicate the experience in oatmeal form. This, as you might imagine, is not without challenges.

The first challenge is how to get oatmeal into ice cream. Simply tossing some raw oats into a custard base is probably not the tastiest way to do this, except perhaps if one is making ice cream for horses (who eat raw oats). Lebovitz solves this problem by making an "oatmeal praline" (he actually uses "praline" as a verb, but I didn't have the heart to do that). To do this, toast some rolled oats on a baking sheet in the oven while simultaneously melting some sugar in a large skillet on the stove. Once the oats are brown and fragrant, mix them into the just-caramelized sugar. Then pour this mixture onto a silpat-lined baking sheet to harden. Once hardened, break into small bits in the food processor. Ok, problem one solved.

The second challenge is the raisins. Dumped right into the ice cream they'd freeze and be hard little bug-like rocks. The solution: moisten them with syrup, and keep them soft with alcohol. The raisins get gently cooked in a sugar syrup, to which a couple tablespoons of whiskey are added at the end of the cooking. The raisins absorb the syrup and whiskey, so they are plump and sweet; and they stay soft and chewy in the freezer.


Finally, the ice cream itself. For this, Lebovitz uses a standard egg yolk custard, but it's sweetened mostly with brown sugar for color and a deeper flavor. A healthy dose of cinnamon is added as well, which you can see speckled in the mix.

This custard is then frozen in the ice cream maker, with the oatmeal praline and raisins tossed in just as it solidifies. A delicious treat!

In other news, I'm back in Singapore...so stay tuned for some Asian photos and treats!


Sunday, November 18, 2012

Making Macarons: A Healthy Dose of Humility

Imperfect macarons.
For those at least as obsessed with baked goods as I am, there comes a time when certain treats known to be difficult are too tempting not to try. Stuff like croissants, puff pastry and yes, macarons. It happens that many of these things are French. This is somehow unsurprising.

First, however, a quick and critical point of distinction that is echoed in virtually every English-language recipe for macarons I've ever seen. In a nutshell (no pun intended), these are not even close to the same thing as coconut macaroons (of the sort commonly seen in the US on Passover). Rather, these macarons are shells made from almond meal (yes, that's why it was a pun), egg whites, and sugar, that are then filled with richly flavored buttercream. When done well, they are sublime in a way the coconut counterpart can only dream of.

Ok, back to my story about trying difficult things. Every recipe for macarons notes that they are finicky and difficult. There are multiple web pages dedicated to macaron troubleshooting, and multiple videos. You can't whip the eggs so much that they dry out, or so little that they won't provide structure. You need to be sure the almonds are ground extremely fine, but can't run the food processor so long that they become a paste. You have to use egg whites, but they can't be fresh...you need to let them dry out a bit on the counter. And macarons are created by squeezing the batter from a pastry bag, preferably in perfectly round little formations that hold together, but don't have an obvious little pointy bit from the pastry bag tip. Plus they should be colored, but you can't use more than a couple drops of liquid food coloring. Obscure powdered colorings are the preferred strategy.

Dry ingredients.
Once they emerge from the oven, moreover, everybody can tell if you did it correctly or not. Did they puff up? Hopefully. Did they crack? Hopefully not. Are the bottoms perfectly flat? Hopefully. Did they turn brown? Hopefully not. Did they develop 'feet'? Hopefully. And are they perfectly round, shiny, smooth and free of blemishes? They better be!

Despite all of these very good reasons not to attempt macarons as a project, I got a new cookbook a few weeks ago (Sugar Baby by Gesine Bullock-Prado) that had an entirely too tempting recipe. So I decided to try them.

The first step was a shopping trip, as her recipe calls for "egg white powder." I had never heard of these, but was happily able to find some at Treasure Island. Then I needed almond meal, which it turns out Trader Joe's has at about half the price of similar products elsewhere. Oh, and I had to "age" my egg whites by leaving them on the counter for a few hours. Ok, all set to go.

Waiting for sugar to heat up.
The first step was to get all of the dry ingredients together (210 g almond meal, 200 g confectioners sugar and 14 g egg white powder) in the food processor and process until very fine, but not too long.

Next I put 3 "aged" egg whites and 3g of salt in my stand mixer, with the whisk attachment, to get them ready.

I then put 200 g of sugar and 1/4 cup water in a saucepan, stirring until the sugar dissolved and then heating until it reaches 240 F.

A few of my favorites.
Prior to this, though, I had started the egg whites beating when the sugar reached 210 F. This was just to get them foamy and ready for the sugar mixture, which got poured into the egg whites slowly down the side of the bowl (so the eggs don't scramble from direct heat) with the motor running at low speed. Once incorporated, I increased the mixer speed to high and let the egg whites beat until they held soft peaks.

Cracked macaron
Ok, now back to the dry ingredients. I first mixed 1/4 cup of water into these to form a paste (apparently this type of paste is good, though almond paste is not), into which the egg white mixture is then gently folded. They need to be combined until there are no more white streaks, but not over-mixed.

I then put this mix into my pastry bag, and piped it onto baking sheets covered with silicone mats, and baked for about 35 minutes at 275 F.

As you can see in the photos, a few of them came out nicely. They had feet! The tops were rounded! They were puffy and had flat bottoms!  But many did not. They cracked and/or had cratered bottoms, and didn't get very puffy.

Lime buttercream.
I did some troubleshooting to find out what I had done wrong. According to one web site that seemed possibly helpful, cracks are an indicator that your macarons have been mixed too much. Or that they have not been mixed enough. Thanks...  They still taste good, though.

And to fill them I made my first Italian-style butter cream made with egg whites and flavored with lime zest and lime juice.

They're pretty tasty. I'm thinking I'd like to try them again to see if I can get better results. Stay tuned!


Saturday, November 3, 2012

Sandwich Making

A point of pride for me is that I have brought my own lunch to work or school virtually every day for my entire life (exceptions: four years of dorm food during undergrad, days when I have social plans at a venue where it would be inappropriate to bring my own food, events when food is provided, extenuating circumstances*). There are a variety of reasons for this. Partly it's to save money. Partly it's because the food I make can be healthful if I want. And partly it's because I've worked in several places where I can make better stuff than what's readily available (downtown Toronto being a notable exception).

Another point of pride is that I try to keep my lunches interesting, even though I'm mostly just eating sandwiches every day. And usually the same sandwich repeated for several days. As I've said here before, this means they've gotta be tasty so I don't get sick of them.

What I've decided to do this week is share some of my sandwich making tips and creations.

First, bread. Bread is critical. That's why I've written 'bread' three times to open this paragraph. I personally find that baguettes are fabulous for just about any sandwich, and they can be easily kept in the freezer (sliced into thirds) to be reheated. The key, though, is to find interesting bread that will not just contain your sandwich, but also enhance it...and not get too soggy in the process. If you don't go with the baguette, find something that's thickly sliced (or that you can slice yourself) and has some flavor to it.

Second, interesting fillings. Boring fillings make boring sandwiches, even in great bread. And boring sandwiches make boring lunches (aside: boring lunches, of course, are what well drillers eat...). The key to interesting sandwich fillings is to always have a few ingredients in your sandwich, and to always keep some interesting condiments around. It's also nice to have some sandwiches where you can prepare a filling in advance for several sandwiches. Here are some of my favorites, ranging from easy to more time consuming:

Easy to shop for and assemble:

  • sliced brie, cucumber, tomato and black pepper (best on a hard roll or baguette; assemble with tomatoes in the middle and cucumbers on top to minimize tomato-related bread sogginess)
  • sliced avocado, red pepper, sprouts, chili paste (great on thick multi-grain bread and enhanced by a bit of cream cheese
  • hommus, tomatoes, cucumbers, sprouts (possibly with some carrots)
  • salami, some sort of hard white cheese, arugula, onion jam (or mustard)
  • prosciutto, sliced apples or pears, some sort of hard white cheese

Require a little bit of prep:
  • sliced turkey (well worth going to Whole Foods to get the freshly roasted stuff, or roast your own), chipotle mayo (make in blender with 6 tbsp mayo, 1 whole chipotle pepper (canned), juice from 1 lime), lettuce, tomato
  • smoked salmon, red onion and wasabi cream cheese (mix some wasabi paste with cream cheese and store in the fridge)
  • curried chicken salad (cook and dice 1 lb of chicken breasts, toss with sliced green onions and maybe some mango, dress with a mix of yogurt, mayo and curry paste from a jar)
  • roasted veggies and apples: slice an onion, a red pepper, an apple, and some mushrooms. Toss with some butter or oil and sprinkle with salt/pepper. Roast at 375 for 20 mins or so. When done, place some of this mixture on bread with some greens and maybe some sort of aged cheese. The veggies are great cold. Endless substitutions are possible.
  • roasted eggplant and goat cheese: Slice up an eggplant and roast it at 375-400 after brushing with oil. Put on bread with a good chevre and some greens.
  • tofu salads: Moosewood New Classics has a couple of these themed Italian and Thai. They basically involve crumbling some tofu, tossing it with some veggies, and then dressing it with a theme-appropriate dressing.
  • Spanish tortilla: Make your favorite Spanish Tortilla recipe (this is a fritata with potatoes and onions) and then slice it up. This one is best on a hard roll or baguette, and is surprisingly delicious cold. My favorite recipe is in Mark Bittman's How to Cook Everything.
I'll add more as I think of them (I'm sure I've made others), but this is a good start. 

Third is assembly, which is more important than you think. I've added some assembly tips for a few of these where it matters even more. I find that assembling my sandwich in the morning works best, and always try to do so in a manner that minimizes the likelihood of soggy bread or otherwise befouled ingredients. I then wrap it tightly in plastic wrap to hold it all together.

Finally, my main point here is that if you've got a bunch of ideas that are easy to shop for, it's easy to eat tasty stuff all the time. I'd also love to hear about others' favorite sandwiches. That could be a whole separate blog. You can also take some pleasure in recalling that Arthur Dent (from The Hitchhiker's Guide to the Galaxy) took pride in his career as a sandwich maker when he gets uprooted and finds himself on Lamuella.


* Those who have known me a very long time may note that an extended extenuating circumstance was the entirety of first grade (translation for Canadians: grade one), during which I did not eat lunch in school at all, ever. My mom did, however, make lunch for me every day...so technically I did bring it. I don't actually remember why I didn't eat my lunch at school, but finally deciding to do so resulted in my getting a Hot Wheels race track, so I consider the whole episode a win. (I have a history of being a bit stubborn about doing mundane things; this is a topic for another entry...or therapy.)

Friday, October 26, 2012

Brioche is Challah With Lots of Butter

I've been intrigued by brioche for a while, particularly as it has made its way onto hipster menus over the past few years as a vehicle for grilled cheese sandwiches and french toast. These are all delicious, but also have a bit of a decadence to them. Curiosity point 1: I wanted to know what went into brioche.

Another point of intrigue was the apparent similarity to challah. Both are egg breads. Both are sweet and taste a bit like cake. Both can be made with raisins for special occasions (with challah this is called "round challah for Rosh Hashanah;" with brioche it's called "pain aux raisins"). Both make fabulous french toast. What's the difference?

Finally, I wondered if brioche was tricky to make, as the dough can be used for lots of other treats as well (sticky buns, brioche aux chocolat, etc.). Looking at cookbooks, they seemed to suggest that you start with a basic loaf of brioche. I wondered if I could do it.

It turns out that the answers to the first two points are related. Brioche is rich and decadent because it's loaded with eggs and butter. For 2 loaves of brioche, I used 6 eggs (including the one used for brushing  the crust) and 2.75 sticks of butter. Lesson one: think twice before ordering that grilled cheese.

The butter is also what separates it from challah. Challah also has a bit of fat, but vegetable oil is used so the bread remains pareve. (For the uninitiated, "pareve" is the word used to describe foods that contain neither milk nor meat. This matters for people who keep kosher and try to avoid mixing these two things.) Thus challah can be served with a meat dinner. What's less clear is why challah and brioche are so similar in the first place. Some Googling does not answer this question, but suggests that the term "challah" has historically referred to a range of breads used in Jewish rituals. The current egg bread is most common in the United States and a seemingly recent tradition. I'd be curious to know how egg bread became the standard, if anybody has a lead on this.

As for the third point, well, I had to try to make some brioche. I'm pleased to say that this went very well. I used Joanne Chang's recipe from Flour (are you sick of hearing her name yet? Her book is just so good...). The recipe calls for a blend of all-purpose and bread flour, some water, yeast, salt, sugar, and eggs. These get mixed together first. Once combined, you add the butter one piece at a time, mixing thoroughly so each piece gets incorporated. This is then mixed with the dough hook for about 15 minutes to allow the dough to come together. It really does change form in this process, as you'd expect.


The dough then sits in the fridge overnight, at which point it has the texture of slimy silly putty. I then divided it in half and pressed each half into a 9" square. The squares then got folded up into thirds (like a letter) and allowed to rise for most of the day in a warm place. These were then brushed with lightly beaten egg, and baked for about 40 minutes in a 350 degree oven.

The result is delicious. Rich and cake-like. I'll probably share it with friends and maybe toast it for breakfast a few times. And rest happily with the knowledge that I could easily make it again.

Wednesday, October 10, 2012

Lime, Cornmeal and Black Pepper Cookies

For reasons I can't quite explain, I have always liked limes and lime-flavored foods. This, of course, isn't unusual on its face. Lots of kids like lime sherbet, popsicles, Life Savers, etc.  I like to think I took it a step further in that I actually recall sucking on lime wedges once upon a time (while being told by my dad, a dentist, that the acid would somehow destroy my teeth). And, some years later, when I discovered the gin and tonic, a lime wedge garnish was a key ingredient.

I don't eat them on their own any more, but I still really like limes. I usually try to have some around because they last a couple weeks and are pretty versatile: sorbet, baked goods, candy, drinks, etc. As I often use several at a time, I also really like inexpensive limes (see my previous post on enjoying food bargains). The best place to get these, by far, is in SE Asian/Indian grocery stores, where they cost a tiny fraction of what they do elsewhere. I recently found them on Devon St. in Chicago at 10 / $1 (compare at 3 / $2 at the supermarket in Ithaca)! I'm not actually sure why they're so much cheaper here, but I'm guessing it's because these cuisines squeeze fresh lime juice over lots of dishes, so people buy them frequently.

Anyhow, this is all lead-up to a cookie recipe I was playing with last night. The basic premise came from the Flour cookbook, which you all know by now that I adore. The original cookie is a sort of butter cookie with yellow cornmeal substituted for about 1/5 of the flour, and a hefty dose of fresh lime zest mixed into the butter. The cornmeal gives the cookies a nice crunch, color and texture. The lime infuses it with a fresh flavor. The cookies are then glazed with a lime juice and powdered sugar glaze with a bit more lime zest.

I took this basic recipe and added some fresh ground black pepper, plus a tiny bit of ground cayenne chile for added spice. I ran out of limes to zest, so I added black pepper to the glaze as well.

The resulting cookies were pretty tasty. They definitely had spice, but it was subtle and lime was clearly the dominant flavor. The black pepper may have gotten a bit lost among all of the other flavors, though. I'd likely stick with either that or the cayenne in the future, but probably not both. I gave them to the students in my graduate seminar today and they said they liked them. I will also be assigning them grades in a few weeks, though, so they may not be the least biased audience.

Saturday, September 29, 2012

The Banana Shake: Humble, Healthful and Deliciously Refreshing

A few years ago on a trip to Thailand, I discovered the banana shake (and blogged about it on my sister's blog). Fruit shake vendors, as I note in that blog post, are a fairly ubiquitous feature of the southeast Asian street (and mall) food scene, and with good reason. Fruits are in abundance, and mixing them with some milk and ice makes for a refreshing antidote to stifling heat.

I confess that after that trip, I purchased my first blender mostly so that I could continue my pattern of banana shake consumption. I've been making them ever since as a post-workout treat, and they are every bit as delicious even four+ years later. Along the way, I've discovered a recipe that works quite well and a few tricks that help.

First, bananas (and particularly the larger varieties that we get in the US) are delicious and have the perfect texture, but aren't quite flavorful enough to carry the shake on their own. In Asia they often add sugar or other sweeteners, but that's not something I wanted to add to a treat that's otherwise pretty healthful and that I consume as often as I do banana shakes. Occasionally I do add a little brown sugar or palm sugar, and it is a nice treat; but mostly I add a generous sprinkle of ground cinnamon instead (maybe 1/8 - 1/4 tsp?). The cinnamon doesn't sweeten but it does bring out the banana flavor and adds a delicious undertone. I've also found that 2% or skim milk work fine in these shakes. I just use whatever I have.

Second, blending time makes a difference. It's easy for the impatient (like me) to turn off the blender right when you no longer hear chunks of ice hitting the blades. That's not long enough. Running it for a couple more minutes (yes, minutes!) works more air into the shake and results in a wonderfully frothy texture.

Third, frozen bananas seem sweeter. If you have perfectly ripe bananas (i.e, deep yellow and covered with small brown spots, but not brown all over; or "fleck'd with brown and [with] a golden hue" in the Chiquita jingle), peel them immediately, put them in an airtight container, and store them in the freezer. These may turn dark brown as they freeze, but they will make fabulous shakes that taste even sweeter than the ones made with fresh bananas. Just add a little extra milk and half the ice.

My banana shake recipe (serves 1):

1 banana
3-4 large ice cubes (or a larger number of smaller cubes)
3/4 cup milk (or enough to fill the blender to the 1 Cup mark when everything else is already in there)
generous sprinkle of cinnamon

Add all ingredients to blender. Blend for 2-3 minutes, or 1-2 minutes beyond the point where the ice is no longer noisy.

This will fill a 12 oz glass with a tiny bit left over, or come within 1/4" or so of the top of a pint glass. A straw is essential to proper enjoyment.

Variations:
This very basic recipe is endlessly malleable and works with other fruits as well. Here are some of my favorites.

For a sweeter shake, add a bit of brown sugar or palm sugar (1-2 tsp is good), or substitute a little sweetened condensed milk for the milk.

For a more tropical taste (or if you just have some extra coconut milk), substitute coconut milk for 1/2 or so of the milk.

Other fruits that I like making shakes with include ataulfo mangoes (regular mangoes don't hold up well; and even ataulfos need sugar for it to taste good), canned Indian mango puree (doesn't need sugar), and avocados (which is more of a Vietnamese treat and also needs a bit of sweetener to get good flavor).

Happy shake-making!

Sunday, September 16, 2012

Aunt Belle's Rugelach: On Being Jewish for the Food

Rugelach
By most any measure, I'm not a particularly religious person. I understand and respect that these sorts of things have value for others (though I don't really get it when this value results in rioting and hurting people, but that's well beyond scope); it's just not for me at this point in my life. As one who was born Jewish and raised in an ostensibly* kosher home  with strong traditions around the holidays, though, I confess that I really do like the food.

In a previous post right around when she passed away, I mentioned Aunt Belle. To refresh briefly, she was: technically my great aunt, 95 years old when she died, and an industrious baker for family holiday celebrations for the entire time that I knew her. One of the few things I ever baked with Aunt Belle was rugelach, which were one of my favorite holiday treats and something I wanted to be sure I learned how to do myself. For the uninitiated out there, rugelach are (I presume) a traditional Eastern European Jewish dessert. They typically have a flaky, not very sweet dough of some sort that's filled with some combination of fruit (dried or jam), nuts, cinnamon, sugar and/or perhaps some chocolate.

So about 15 years ago, I asked Aunt Belle if she would show me how to make rugelach. I went over to her house one afternoon, and we made these together. I've made them several times since then, but figured they'd be particularly appropriate to bring to Rosh Hashanah dinner with my Chicago cousins. And also a good recipe to share with you, my dear readers.

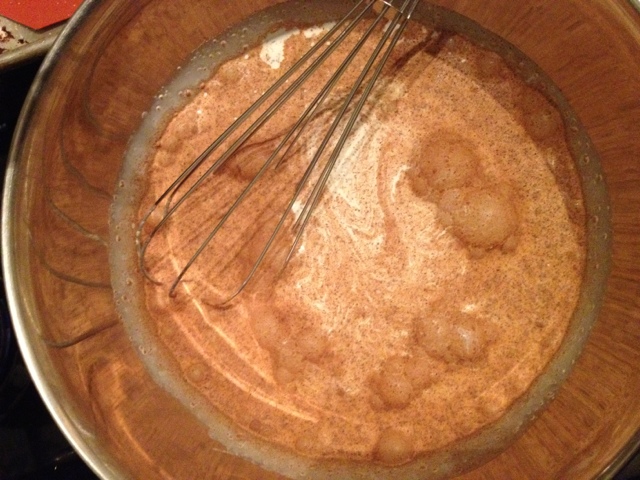
Lots of butter...what could be
bad here? 
To be fair, this recipe is not unique to Aunt Belle. She had it copied out of a newspaper, I think. And it's really similar to others I've seen in cookbooks. But I think of it as her recipe, and so can you.

For a treat that's very rich and flaky, these are actually fairly simple to make and pretty forgiving. They are not heart- or otherwise healthy in any way shape or form, however, so be warned now. Except perhaps for mental health. I can assure you that eating several is very good for that.

Dough is ready!
To make the dough, simply mix 1/4 teaspoon of salt with 2 cups of flour in the food processor. Once combined, add 1/2 pound (2 sticks) of slightly softened butter, each cut into quarters; and 1/2 pound (1 brick) of slightly softened cream cheese. Process in pulses until it's all combined and forms several large chunks. Over-mixing is the only mistake I've ever made with these, and it resulted in a sticky dough that was impossible to work with.

Once the dough is made, divide it into 4 equally-sized chunks. Wrap each one in plastic wrap, and refrigerate for at least an hour. (At this point when I made these with Aunt Belle, she offered me a can of Vernors and took me into the living room to, after much subtle inquiry about my social life, ask if I'd like her to set me up with any of her friends' granddaughters. I suggest that you find something similarly engaging to do while you wait for the dough to chill.)

While the dough is chilling, sort out how you're going to fill the rugelach. There's no sugar in the dough, so something sweet is essential. I usually use a mix of sugar (1/4 cup) and cinnamon (one teaspoon), plus some raspberry jam and chocolate chips. If I'm not baking for a nut-allergic crowd, I add some chopped walnuts (maybe 1/2 cup?).

My work surface and highly
imperfect dough rolling
You can also preheat the oven to 350 at this point and get a couple baking sheets ready. Silicone baking sheet liners work really well for these, but spraying with non-stick spray also works.

Once the dough is chilled, repeat these steps for each of the disks: Roll it out on a well-floured surface into a disk that's about 1/8" thick and 10 - 11" across. Spread the filling on this disk. I usually spread a spoonful of jam first, then sprinkle the cinnamon/sugar blend, then the walnuts, and finally a handful of chocolate chips.

Next, cut the disk into quarters. Cut each of these quarters in half again, and then again as if you were making spokes on a wheel or slicing a pizza. Don't worry if the slices are exactly even or not.

Starting from the outside, gently lift each wedge and roll it fairly tightly toward the center, capturing the filling as you roll (though chips and nuts may scatter a bit). Place the rolled up rugelach on the baking sheet.

Ready to be baked!
Bake at 350 for 20 - 25 minutes, until they're puffy and very light brown on top (and golden on the bottom). Yum!

As I said, there are lots of variations on this. Some people glaze them with a bit of egg to make them extra brown. Others sprinkle sugar on top. There are also different types of dough. I think it'd be interesting to do a savory version as well (maybe some onion jam with dried cranberries and black pepper?).

Here are my photos of the rugelach I made yesterday. Now I'm off to share them with the cousins!


 * I say ostensibly kosher because, despite having separate dairy and meat dishes/silverware, pepperoni pizza was perfectly acceptable fare for most of my childhood, as long as it was consumed on a paper plate. The logic continues to befuddle.


Sunday, September 9, 2012

Lime and Long Pepper Bars

Lots of limes!
I've spoken before about my love for both spicy desserts and the Thai long pepper. Long pepper works in these contexts because it's pretty spicy, but not searingly hot. It's got a slight sweetness and hint of anise that black pepper or crushed cayenne lack. And it's also dry, so blends really nicely with sugar in the food processor (even if it causes a minor coughing fit when I take the cover off). Stick a few long peppercorns in the food processor with sugar. Process for a minute or two. Strain the results. The result can change any dessert, often for the better.

Yesterday I decided to try this with lime bars. Let me say first that I'm pretty picky about lemon or lime bars, which can often be quite mediocre. I like mine to have a crust that's crisp and has some taste; not mushy and a weak base for the lemon/lime part. I like the lemon/lime part to be intensely flavored, with lots of fresh juice. It should overwhelm the senses with fresh and bright citrus, not make you vaguely recall lemon-scented cleansers. And finally, they should be luscious and creamy in texture, not crumbly or dry. Easy, right?

I've probably tried seven or eight recipes for these over the past few years, and have settled on two that I like a lot. My favorite (as for so many things) is from Joann Chang's Flour cookbook. It has an incredible amount of rich, delicious lemon curd piled on a light, crispy shortbread. The recipe is a bit over the top, though, as it requires 3 sticks of butter, 12 eggs, some heavy cream and the juice of 14-16 lemons or limes!  Not something I do every day, but well worth it on special occasions.
Mixing the filling: sugar, eggs,
a little flour, lime juice, lime zest

For a more everyday lemon or lime bar, I love the recipe in Alice Medrich's Pure Dessert. These lemon bars have all of the key properties (to review: crisp, tart, creamy, delicious), and can be thrown together in an hour or so (including baking time). Plus the ingredient list is eminently reasonable: 1/2 cup of citrus juice, 3 eggs, 1 stick of butter; plus, of course, some flour, sugar and salt. Her secrets? Bake the crust until it's pretty brown before adding the lemon/lime filling. Use lots of juice and fresh zest in the filling. Tastiness.

Crisply baked crust just
before adding the filling
Having shared my favorite lemon/lime bar recipes, back to the long pepper. Black pepper is known to pair well with citrus. They show up together all the time in sorbets, shortbread, etc. (My mother is now saying to me silently, "They show up together all the time only in your kitchen..." Trust me, though, they do.) Surely you'll at least concede that lemon pepper chicken was all the rage for a while in the late 90s, right?

Anyway, I wanted to try spicy lime bars, and I had some long pepper left over from that trip to Indonesia last spring. I also had some limes that I had picked up very cheaply (10 / $1!) on Devon St. here in Chicago (on which I will have to write a post once I've explored more). I wanted to use it up before it loses its flavor. So I blended it with most of the sugar for the lime bar recipe.  The recipe calls for 1.25 cups; I made 1 cup of long pepper sugar and used it for all of the sugar in the crust (1/4 cup) and most of the sugar in the filling (1 cup), using plain sugar for the rest. On its own, the long pepper sugar is very spicy.

The result is a pleasantly spicy lime bar, according to me and one friend (who, notably, is often averse to spicy foods and isn't afraid to tell me when she doesn't like stuff). The heat of the long pepper is palpable and lingers for a couple minutes after each bite. But it doesn't build or burn; just kind of tingles. And it doesn't obliterate the lime. I'd actually consider using a bit less long pepper sugar in the filling next time, but my friend liked it as is. An interesting experiment.

I think it would be really interesting to do the same thing with black pepper and taste them together. My guess is that the long pepper would have more burn, and that the black pepper would be more assertive and throw off the balance. I've got enough long pepper for one more recipe, probably, so stay tuned.


Tuesday, September 4, 2012

Tomato Curry with Spinach and Coconut

Oops, I did it again. I've gone another long time without a blog post. Sorry about that. This time I feel like I have a decent excuse: I've relocated to Chicago to start a new job. The past few weeks have been full of packing and unpacking, loading and unloading, driving and driving, setting up home and office, learning how to commute again, and lots of other fun relocation-related stuff.

The good news for you, dear readers, is that I'm pretty excited about my new kitchen. For the first time in about four years I'm living in one place, and actually have space for my various appliances and cooking gear. I also have a gas stove and an oven big enough to hold a half-sheet pan. It's a kitchen I like spending time in, so hopefully I'll have lots to write about.

In that vein, I describe here one of the first things I cooked in my new place: a tomato and coconut curry with spinach. Why this? Several reasons.


First, I was home visiting family last week and went to Detroit's wonderful Eastern Market. Among other things, I picked up a quart of fresh, local tomatoes without having any real idea of what to do with them. Second, I'm working my way through Pushpesh Pant's wonderfully comprehensive, if often cryptic, India: The Cookbook. Name a vegetable (including banana flower stems!) and he's got a few recipes for you, so this was a natural place to look. Third, Chicago has a fabulous Little India on Devon St., so it was easy to find some fresh curry leaves, coconut powder and spices.

To make the curry, I boiled a pound or so of diced tomatoes in water with a sliced onion, a couple minced chilies, 5 or 6 curry leaves, and about 1/4 pound of sliced spinach. After a few minutes, this was thickened with 1/2 cup of coconut powder (Note: in an example of Pant's crypticness, he says only "half coconut, dried, finely grated;" some Googling suggested that 1/2 cup was the right amount), some turmeric and a teaspoon or so of coarse salt.


Meanwhile, I sauted another sliced onion in hot oil with some mustard seeds (1 tsp) and a few dried chillies. When the onions were golden brown, this was added to the boiled mixture and stirred together. This was then simmered for a while to evaporate some of the liquid and meld the flavors.


I served the result over rice and reheated it for several days. A delicious and unusual mix of flavors. Stay tuned for more curries and hopefully more regular posts!


Friday, July 20, 2012

Red Rum: Homemade Jello Shots

It's a bit hard to miss that nostalgia is at least part of (if not all) the rage lately. Superhero movies target thirty-somethings (and older). Cocktail bars are recreating prohibition-era drinks with homemade bitters and the like. And restaurants/cookbooks are playing on childhood flavors and memories as, for example, with the "cereal milk" at Momofuku Milk Bar or Joanne Chang's recipes for homemade Oreos and Pop Tarts in her oft-lauded-on-Pearwise Flour cookbook.

What's fun about the food-related nostalgia is that the re-creations are often much, much better than the childhood memories they're trying to evoke. Have you tried a Pop Tart lately? If not, trust me. This is what excited me about the idea of doing some homemade, very high quality Jello shots. Jello shots are a classic sugar-laden and potent undergrad-era (and, ok, a bit after that for some) party accessory. The idea of making them with fresh fruit juices and infused liquors was -- at least to me -- quite appealing.

Not surprisingly, I'm certainly not the first to have this idea. There is, in fact, a whole blog (the Jelly Shot Test Kitchen) dedicated to the topic, and the author's creations are actually pretty incredible. As you can see, the site has spawned a book and generated quite a bit of media attention. My goals are not nearly so lofty, but I did want to play with the concept.

Infusing rum with berries.
I started with some rum that I had infused with fresh New York strawberries. I sliced up a quart of strawberries (removing the tops) and left them in a sealed jar with enough rum to just cover the berries for a month or so. After straining out the berries, you can see in the photo that the rum turned a delightful shade of bright red (which actually surprised me).
Red rum!!

Using a recipe for an Elderflower Mojito jelly shot as a model, I first made a simple syrup of sugar and water and dissolved 4 packets of plain gelatin in this syrup. I then added an equal (to the amount of syrup) amount of freshly squeezed lime juice, followed by a cup of the strawberry rum. After stirring it all together, I separated it into tiny paper cups and let them set in the fridge overnight.

Dissolving gelatin
The result was very stiff, so I probably could've used less gelatin if I wanted. They were tasty, tasting clearly of strawberry with a hint of rum flavor. The lime and syrup really provided accent; you couldn't taste them. And to taste much of anything, you had to eat it slowly...which sort of defeats the purpose of a shot.
Shots about to gel.

Still, they were fun. And brought back memories of shots made with actual Jello; without having to eat actual Jello. That was the goal, so I declare mission accomplished.


Monday, July 2, 2012

Lots of Little Things

It's once again been a few days since my last post. There are times when I don't post because I just haven't made any food. This was the case for much of the spring. Then there are times when I don't post because I just haven't made any one thing that's post-worthy, despite making lots of relatively uninteresting little things. This has been one of those weeks, so today's post is focused on those little things, and on making them as interesting as possible.

Indian Spanish Tortilla, cooking
I'll start with my lunch for this week, an Indian-Spanish tortilla. (If I haven't mentioned this before, I mostly cook for myself; so make enough to eat lunch and dinner for 4-5 days at a time. It's a great incentive to make things that are tasty, but the cost of failure [i.e., eating bad food for 4-5 days] is high).  One of my favorite easy lunches is a Spanish tortilla sandwich -- slices of a potato/onion/egg concoction sandwiched on a nice roll. This week I decided to put an Indian spin on that, adding some cumin seeds, curry leaves and nigella seeds to the oil (3/4 cup or so, later drained off) before cooking the potatoes (1.25 pounds, diced to 1/4"). I also added some kashmiri chili powder to the eggs along with some salt and black pepper. A delicious spin on a classic dish.

Yesterday I celebrated Canada Day with some Canadian and American friends, and brought a couple of nice summer desserts. I knew they had s'mores planned for the kids, so I made my own vanilla-flavored marshmallows to appease the adults at the party too. Marshmallows are actually pretty easy to make, with the right gear and a little patience. I just boiled 1/2 cup sugar, 1/2 cup water and 2/3 cup corn syrup until it reached 240 degrees. I then poured this into my stand mixer with the whisk, where I had already placed 3 packets of gelatin powder into 1/2 cup cold water to soften for 15 mins. These were beaten together at high speed for 15 mins until the mixture was firm, fluffy and, well, marshmallow-like. Then the white mixture gets poured into a 13 x 9" pan lined with foil and non-stick spray to set. Finally, I sliced them into small squares, which was tossed in a blend of corn starch and powdered sugar to keep them from sticking to each other. No pictures, unfortunately, but they disappeared pretty quickly.

Overly dramatic shot of watermelon
and wine concoction
The marshmallows were for later in the evening, though. We needed a refreshing afternoon treat, too, so I made a couple sorbets. Watermelon sorbet is super easy and delicious: just a bunch of watermelon pureed with sugar and some lime juice, and a tiny bit of vodka and stabilizer to improve the texture. I also made a bit of lemongrass-lime leaf sorbet, by steeping lemongrass (3 stalks) and lime leaves (5) in a sugar syrup, to which I then added the juice of one lime and some stabilizer. Again, tasty. In a possibly ill-advised from a purist's standpoint, but still delicious, move the watermelon sorbet was incorporated into a glass of wine with some basil, shown here as the sun was setting.

Stay tuned for more summer treats!


Tuesday, June 19, 2012

Long Pepper Pound Cake

Long Peppercorns in their jar
After tasting a cupcake or something, one of my colleagues once commented, "I like that your desserts sometimes burn." He wasn't referring to heat from the oven, but to my love for mixing spicy and sweet. Desserts aren't often that spicy, but their general fattiness/creaminess actually makes them a great way to deliver a subtle punch. I've talked about some of those recipes here, and there have been others. This is another post in the spicy dessert vein.

Completed pound cake.
Some of you may recall my brief fixation on the Long Pepper, which I described in this post a couple years ago. That bag of long peppers is, well, long gone; but I found some more in a spice market on my recent trip to Yogyakarta, Indonesia. To recap, long peppers are much more like black peppercorns than they are chile or bell peppers. They're spicy and taste like a rough cross between black pepper and star anise, with maybe a hint of smokiness.  Since that last blog post, I've also made a really tasty (trust me) ice cream with them too.

This time, however,  the goal was a spicy but sweet poundcake. I started with Pichet Ong's delicious sweetened condensed milk poundcake. He suggests using vanilla as the main flavor. I've made it with pandan leaves as well. This time I used long pepper, and it was ridiculously simple.

Before blending with sugar
I took a handful of long peppercorns and put them in the food processor with 1/2 cup of sugar. I spun it for a few minutes until the peppercorns had broken up substantially. Opening the food processor released a sweet/spicy haze of sugar/pepper dust that caused a minor coughing fit (I closed the food processor during said coughing, don't worry). Then I strained the sugar and put it back in the food processor. I tasted the sugar and it packed some serious bite. Perfect, as it would be diluted by all of the other ingredients.

I added 1/2 pound of soft butter and spun until they were well combined, followed by a bit less than a can of sweetened condensed milk (he calls for 3/4 cup; i accidentally poured more in), and then 3 eggs. After processing in quick pulses until well blended, I added 1.5 cups of flour mixed with 3/4 tsp baking powder and pulsed a few more times.
After blending with sugar.

Finally I poured this batter into an 8.5 x 4.5 loaf pan and baked at 325 F for a bit over an hour.

I tested this on colleagues and got lots of good feedback. People liked the sweetness followed by a little bit of heat. The spice was subtle, but had a definite presence. A win, I'd say.

If one wanted to make this without long peppers, I'd say you could use a combination of black peppercorns and star anise (maybe 2/3 pepper to 1/3 anise?). If you try it, let me know how it works!


Saturday, June 9, 2012

Indian Brunch plus Lemon, Ginger & Cumin Scones

After venturing to Syracuse last week to procure curry leaves, mangoes and other delights, I made brunch for some friends this morning with an Indian theme. I've mentioned before that one of my favorite brunch dishes is eggs made with some curry leaves, onions, ginger and a Thai chile. I supplemented that with a richly spiced potato curry in tomato sauce and some fresh pineapple (thanks, Sahara!).

I believe brunch to be  incomplete without baked goods, however, so I wanted to make an appropriate scone. I decided to start with Joanne Chang's fabulous recipe for lemon-ginger scones, as both of these are plausibly Indian flavors. Plus, it's a great recipe into which she squeezes fresh lemon zest, fresh ginger, dried ginger and candied ginger. It's topped with a sweet lemon glaze made with just fresh lemon juice and powdered sugar.

To make them more 'Indian,' I added a few (1/2 tsp or so) cumin seeds to the batter. These were very subtle, though, so I wanted to add more punch. To do that, I added some ground cumin (1/2 tsp) and a bit of ground cayenne (1/4 tsp) to the glaze, mixing the spices with the sugar before adding the lemon juice. The result was a powerfully tasty glaze when eaten on its own, but gave a nice subtle accent to the scones when spread thinly on top. A win, I think. And friends seemed to agree.


Tuesday, June 5, 2012

Mango & Szechuan Pepper Sorbet

I hesitate to admit this broadly, but students who have taken my undergraduate courses know that I always include at least one exam question that features "Larry the Mango Lover," a fictional aficionado of mangoes. Larry often finds himself without access to the mangoes he loves, and the questions (which do tie directly back to course concepts, just for the record) are about how he resolves this situation. In a course about online social support, Larry turns to the Mango Aficionados Networking Group Online (yes, MANGO) for help.  When we discuss common ground in communication, Larry helps his friend pick out the right mango to bring home from the Asian grocery ("Is it yellow?" "Ok, but is the end more pointy or round?"). You get the idea.

More than one student has figured out that Larry is a thinly veiled and somewhat exaggerated version of yours truly. I haven't turned to online support groups for mango lovers, but I certainly do miss good mangos when I'm in Ithaca. And that's why, on a recent trip to an Indian grocery in Syracuse, I didn't blink at the idea of bringing home a box of 20 or so small Ataulfo mangos from Mexico.

Schezuan Peppercorns
I've got plans for these mangos. Of course, I'll eat one every morning with some plain yogurt for breakfast. But they won't all last that long. I'm also planning a mango gazpacho. Maybe some mango salsa (which are both actually pretty similar). And the topic of today's post: mango sorbet.

Not just any mango sorbet, though. I added Szechuan peppercorns just to make it interesting. For those who don't know them, Szechuan peppercorns are a dried berry that is both spicy and (literally) mouth-numbing. Spice goes nicely with mango, so I figured this would be worth trying.

Steeping syrup
To get the peppercorn flavor into the sorbet, I steeped a few tablespoons of them in the simple syrup that would sweeten the sorbet. I brought these to a boil and let steep for about 5 hours. Then I sliced up a few mangos (about 2 pounds worth, or 5 small ones) and put these in the blender with the syrup (1 cup, peppercorns strained out), juice from one lime, a tablespoon of clear rum (to prevent ice crystals) and a bit of sorbet stabilizer (to prevent more ice crystals). This was then frozen in the ice cream maker.
Finished Sorbet

The result is tasty. It's sweet like mango and has a very slight hint of the peppercorns, with a very slight bite. It's interesting and I like it, but I wonder if there's a way to punch up the spice a bit. Maybe a tiny bit of salt, or leaving some cracked peppercorns in the mix next time.